AI助手支持GPT4.0
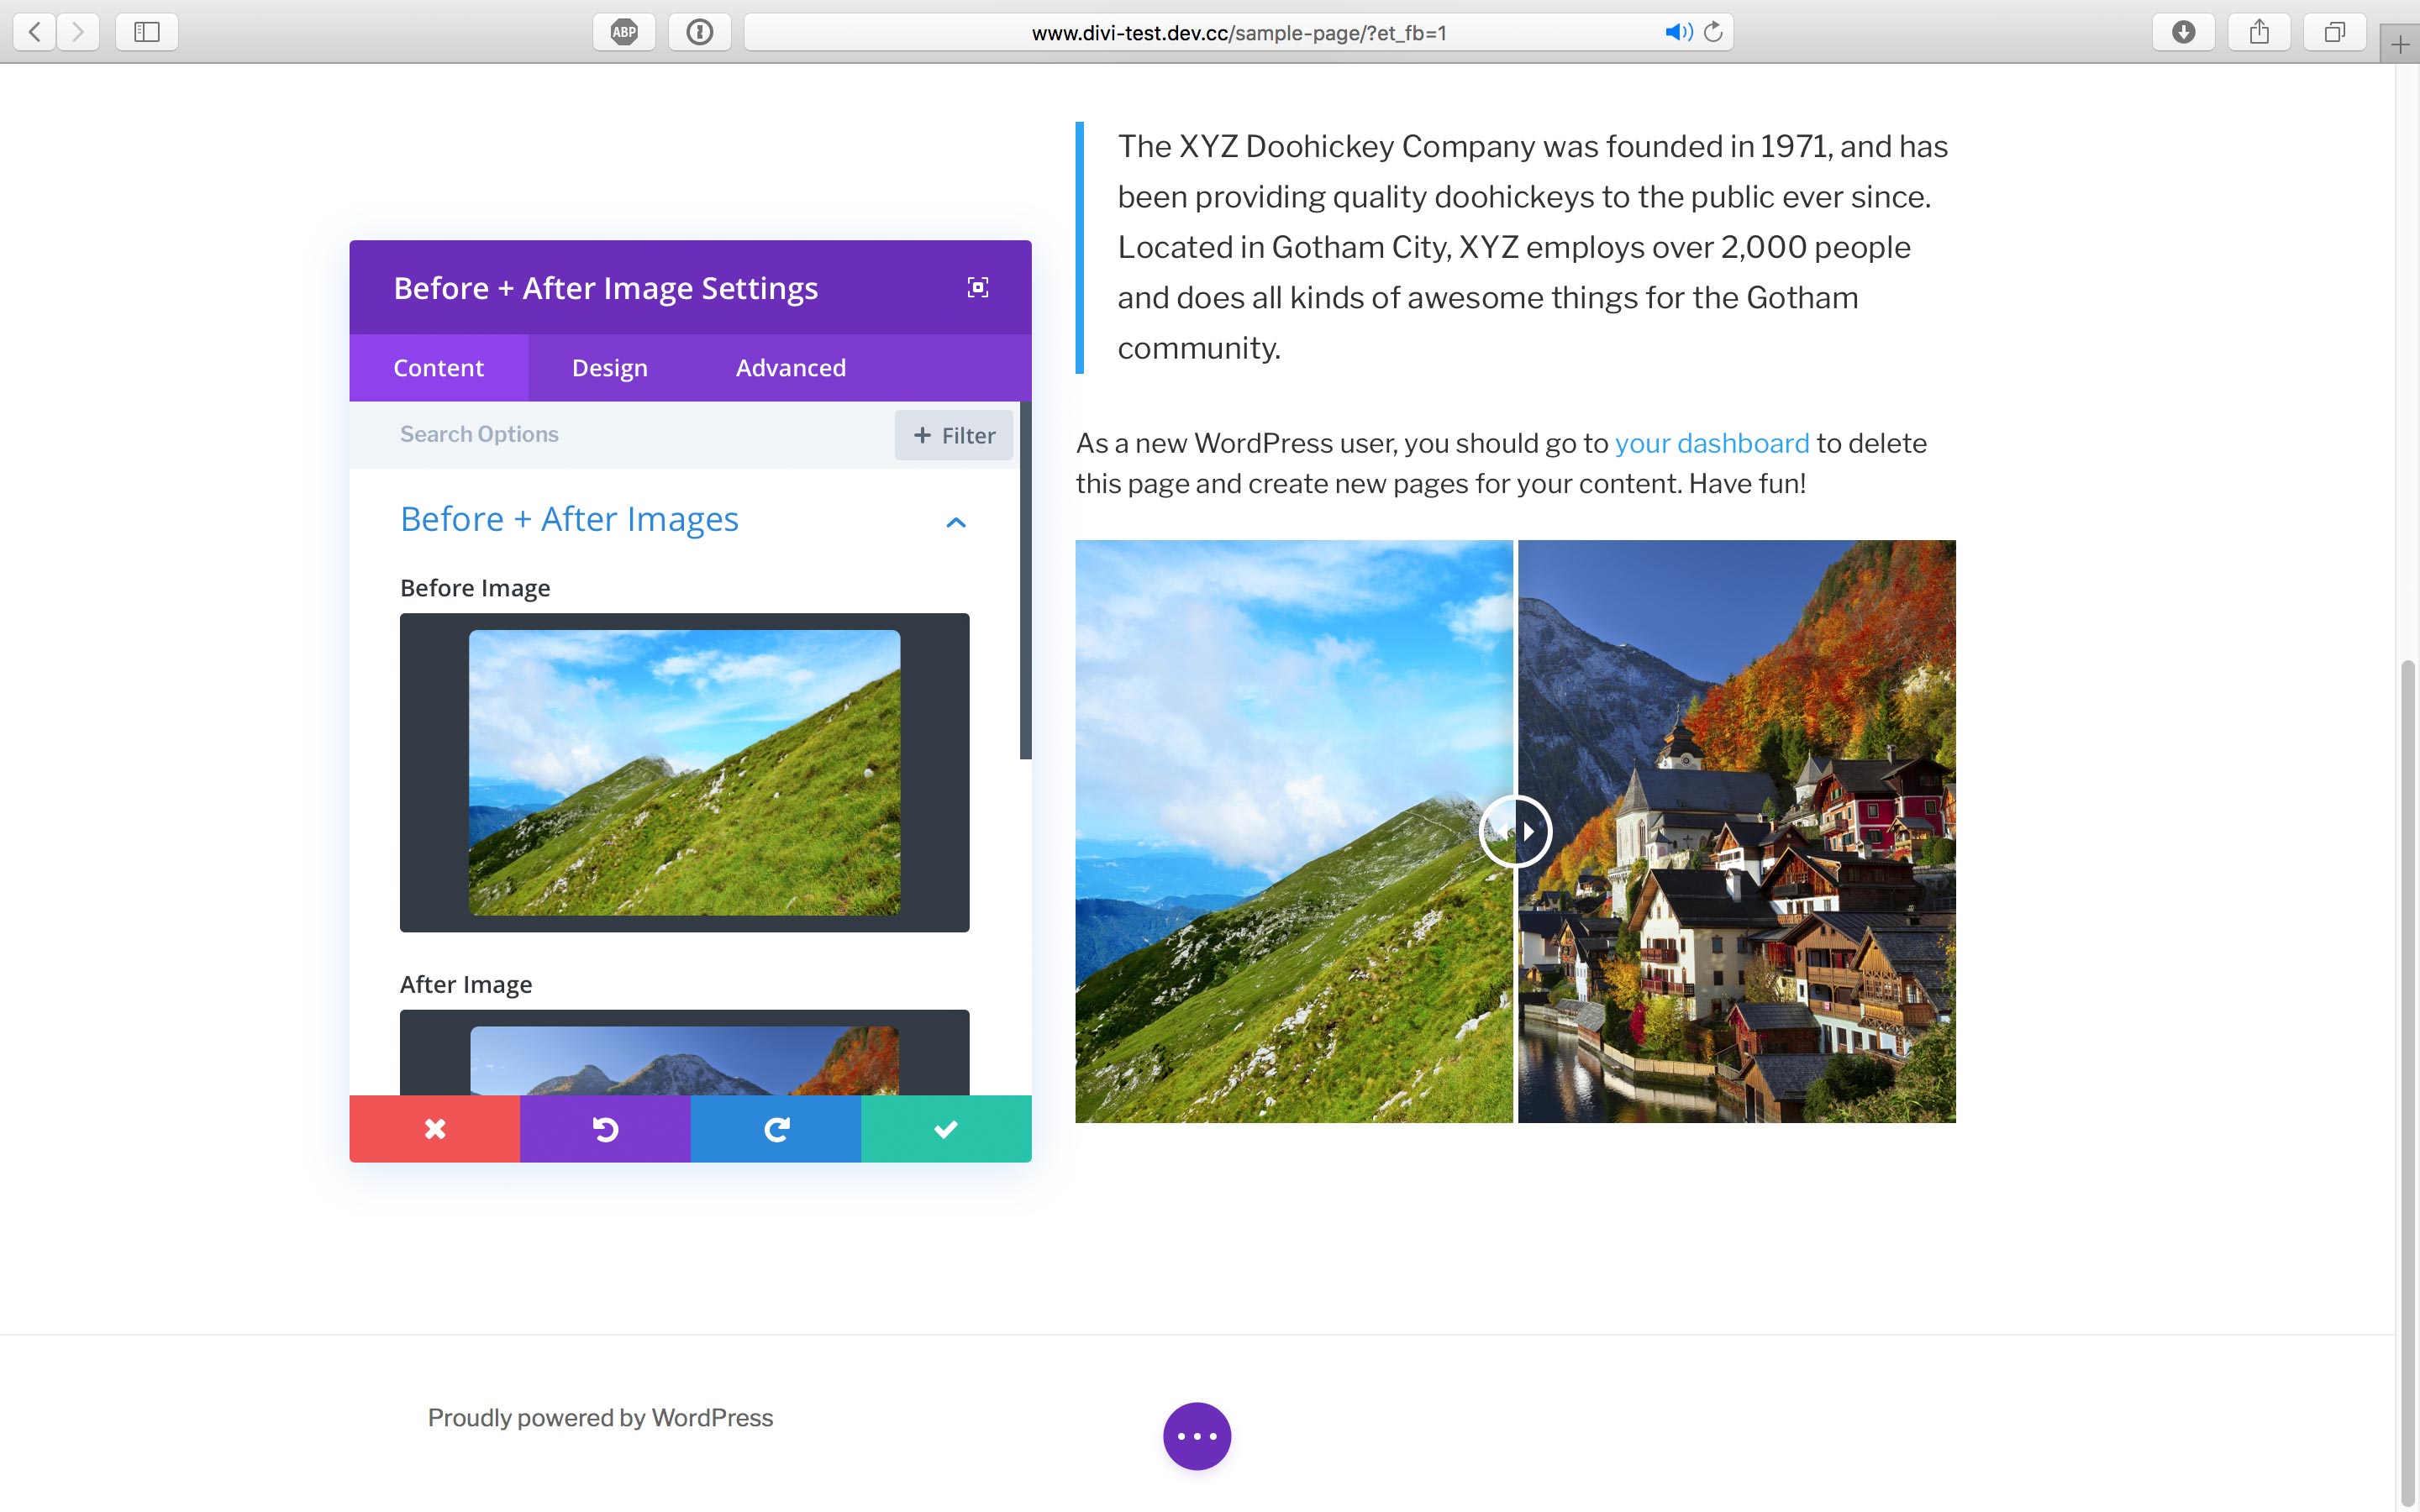
Before + After Images for Divi adds a new Divi Builder module that allows the user to create a simple composite Before/After image from two images at a set size.
用于Divi的图像前+图像后添加了一个新的Divi Builder模块,该模块使用户可以从两个具有固定大小的图像中创建简单的合成图像前/后图像。Compatible with the Visual Builder.与Visual Builder兼容。Uses cropped image sizes within the Divi Builder module (image size selection).在Divi Builder模块中使用裁剪的图像尺寸(选择图像尺寸)。Supports lazy loading.支持延迟加载。Mobile responsive.移动响应。Lightweight.轻巧。Requirements要求This plugin is designed to work with the Divi Builder plugin or a theme such as Divi or Extra by 此插件旨在通过rel="nofollow">Elegant Themes (affiliate link).rel =“ nofollow”>经典主题(会员链接)。My Plugins for Divi我的Divi插件Before + After Images for Divi Divi的图像前后+ Image Size Selection for Divi 为Divi选择图像大小 Supporting Before + After Images for Divi支持Divi的图像前后+ If you found this plugin helpful, please support the developer with a small donation:如果您发现此插件很有用,请捐赠少量资金支持开发人员:Buy me a coffee 给我买杯咖啡 Credit信用Plugin created by Aaron Bolton. Aaron Bolton创建的插件。 Before + After Images for Divi brings the power of TwentyTwenty by Zurb to your Divi Divi的图像前后+ 将 TuntyTwenty by Zurb的力量带到您的DiviBuilder installation.构建器安装。
This plugin is designed to work with the Divi Builder plugin or a theme such as Divi or Extra by
此插件旨在通过
rel="nofollow">Elegant Themes (affiliate link).
rel =“ nofollow”>经典主题(会员链接)。
If you found this plugin helpful, please support the developer with a small donation:
如果您发现此插件很有用,请捐赠少量资金支持开发人员:
Plugin created by Aaron Bolton.
Aaron Bolton创建的插件。
Before + After Images for Divi brings the power of TwentyTwenty by Zurb to your Divi
Divi的图像前后+ 将 TuntyTwenty by Zurb的力量带到您的DiviBuilder installation.构建器安装。
Builder installation.
构建器安装。
原文出处:http://www.sanshu.cn/a/4311.html
群主管理都是支付大佬