AI助手支持GPT4.0
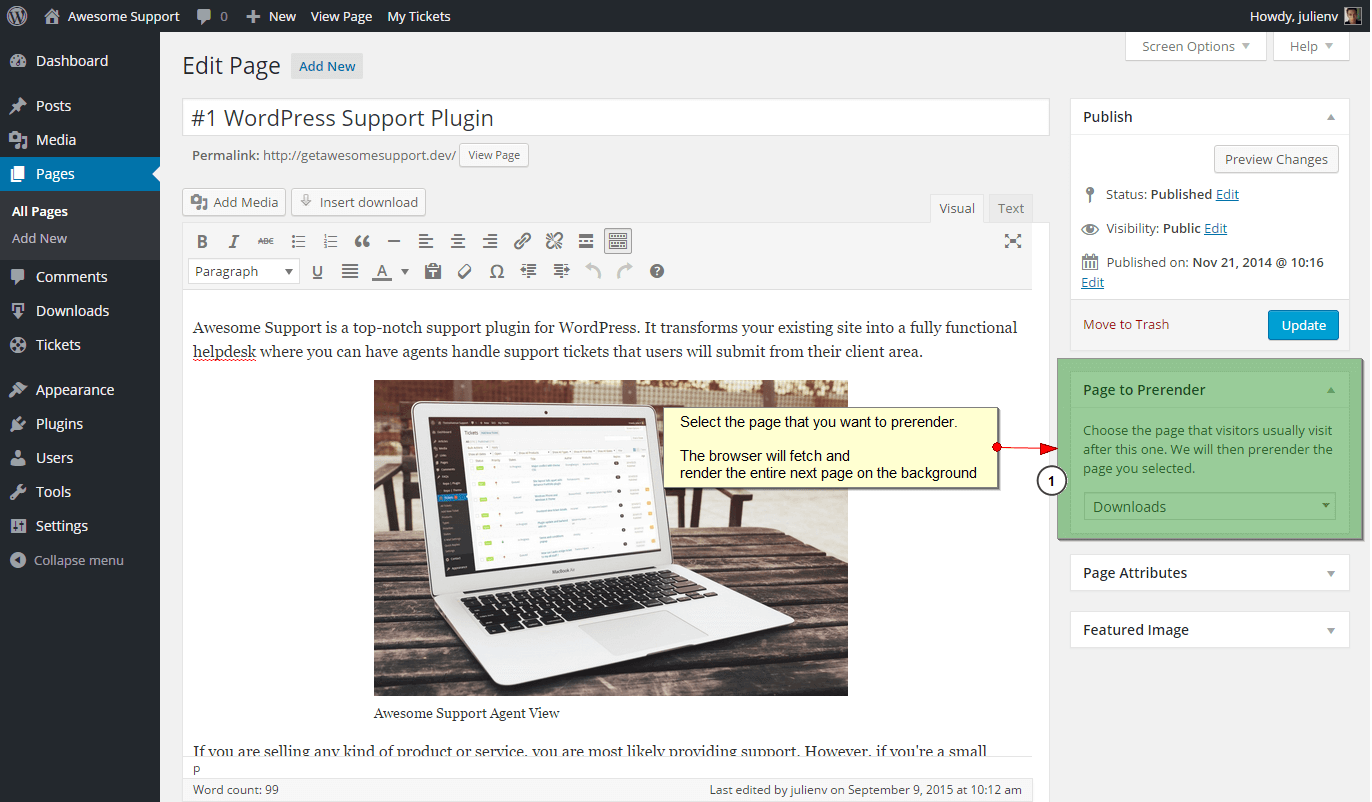
This plugin does only one thing: it allows you to prerender specific pages / posts on your WordPress site.
此插件仅做一件事:它允许您在WordPress网站上预渲染特定的页面/帖子。
The prerendering feature which will make your website faster, as the browser will fetch and
prerendering 功能可以使您的网站更快,因为浏览器可以获取并
render the entire next page on the background.
在背景上渲染整个下一页。
Therefore, if you know which page your visitors are most likely to visit next, you can preload it.
因此,如果您知道访问者接下来最有可能访问哪个页面,则可以对其进行预加载。
The User Experience (UX) will therefore be slightly better.
因此,用户体验(UX)会稍微好一些。
If you want more in-depth explanations, we've written a mini-tutorial on our blog: Behavior Flow: Speed Up Your WordPress Site
“>行为流程:加快您的WordPress网站
Simply sign in to Google Analytics and go to the Behavior Flow page (
只需登录Google Analytics(分析)并进入“行为流”页面(
="https://support.google.com/analytics/answer/2785577?hl=en" rel="nofollow">Analytics Help).
=“ https://support.google.com/analytics/answer/2785577?hl=zh_CN” rel =“ nofollow”> Analytics帮助)。
Enabling page prerendering will likely increase server load.
启用页面预渲染可能会增加服务器负载。
You should figure out a good balance between prerendering and increasing the server load.
您应该在预渲染和增加服务器负载之间找到一个良好的平衡。
Visitors that land on your site will request the entire next page even if they do not visit it…
登陆您网站的访问者会请求整个下一页,即使他们没有访问它……
behavior-flow.zip
behavior-flow.zip Navigate to the ‘Add New’ in the plugins dashboard导航至插件仪表板中的“添加新项” Navigate to the ‘Upload’ area导航到“上传”区域Select behavior-flow.zip from your computer从计算机中选择 behavior-flow.zip Click ‘Install Now’点击“立即安装” Activate the plugin in the Plugin dashboard在“插件”信息中心中激活插件
behavior-flow.zip Click ‘Install Now’点击“立即安装” Activate the plugin in the Plugin dashboard在“插件”信息中心中激活插件
behavior-flow.zip Extract the behavior-flow directory to your computer将 behavior-flow 目录提取到您的计算机中Upload the behavior-flow directory to the /wp-content/plugins/ directory将行为流目录上载到 / wp-content / plugins / 目录Activate the plugin in the Plugin dashboard在“插件”信息中心中激活插件
behavior-flow
behavior-flow 目录提取到您的计算机中Upload the behavior-flow directory to the /wp-content/plugins/ directory将行为流目录上载到 / wp-content / plugins / 目录Activate the plugin in the Plugin dashboard在“插件”信息中心中激活插件
/wp-content/plugins/
行为流目录上载到 / wp-content / plugins / 目录Activate the plugin in the Plugin dashboard在“插件”信息中心中激活插件
/ wp-content / plugins / 目录Activate the plugin in the Plugin dashboard在“插件”信息中心中激活插件
原文出处:http://www.sanshu.cn/a/4330.html
群主管理都是支付大佬